welcome to Sawlinux, this is sharing the site of PC

Video Post


stat counters
Follow us on Twitter Subscribe to RSS Subscribe via Email

Tuesday, June 29, 2010

Saw Linux  /  5:48 PM  /    /  No comments


This document pertains to HP or Compaq Desktop computers with Windows XP.
HP computers that ship with Microsoft Windows XP and Compaq Presario Desktop computers made in spring of 2003 and later already come with a hidden preloaded recovery partition. This hidden partition can be used to recover all of the original software in the event of a major problem by pressing the F10
key repeatedly when the computer is first started. However, there might be times when recovery discs are needed to restore the computer, such as when a virus destroys the recovery partition. By using the Recovery CD-DVD Creator program, you can create a set of recovery discs to restore your computer back to its original condition.
Recovery CD-DVD Creator software comes on HP and Compaq Desktop computers made in Spring of 2003 and later. It is strongly recommended that you create a recovery disc set. If your HP or Compaq desktop computer with Windows XP does not have the HP Recovery CD Creator software or if recovery CDs were not created before the recovery partition was damaged or erased, you will need to find a set of recovery discs that matches your model number from the Internet or install a new operating system.
The Recovery CD Creator software can be used to make one set

of recovery CDs for the computer. The recovery CD set contains a complete set of the original operating system, drivers, and application software that shipped with the computer.
Features and important information
The following is a list of features and important information about the Recovery CD Creator program:
    The Recovery CD-DVD Creator software creates a set of system recovery discs using blank, writable CDs or DVDs. HP recommends using blank CD-Rs or DVD+Rs (if supported). The Recovery CD-DVD Creator does not write to DVD-Rs even if the DVD-RW drive supports writing to DVD-Rs. Use a name-brand disc from a manufacturer you trust because recovery CDs/DVDs are very important. You will need up to 10 blank CD-R discs or 2 blank DVD+R discs. The CD-DVD Creator software states how many discs is needed.

    NOTE: Some versions of Recovery CD Creator software will not work with certain discs (such as mini-discs, DVD-R, DVD-RW, DVD+RW, or Dual Layer DVD discs). Media incompatibility information can be read from the initial windows of the Recovery CD Creator software.
    The Creator program permits only one complete set of CDs to be created.The Creator program burns and verifies CDs to ensure proper functionality.The Creator program requires an uncorrupted recovery partition to create a set of CDs. Uncorrupted means the recovery partition has not
    been modified or removed.The creation process requires 10 to 12 minutes per CD, and the entire recovery set does not need to be created in one session.The program can be aborted at any time, except during the writing process, by clicking the Abort
    button. The next time the program is run, it automatically starts where it left off.
Creating Recovery discs from Windows
Complete the following steps to create the recovery disc set:

NOTE: Some versions of Recovery CD-DVD Creator will not work with certain discs (such as mini-discs, CD-RW, DVD-R, DVD-RW, DVD+RW, or Dual Layer DVD discs).
  1. Disconnect from the Internet and close all other software that might be open. This is not necessary, but might help avoid problems that can occur.
  2. Click Start

    , and then click All Programs
    .
  3. Choose the option below that applies to your computer:
      For HP Pavilion and Media Center computers, click Hewlett-Packard
      and then click HP PC Recovery CD Creator
      to start the program.orClick PC Help & Tools

      and then click HP CD Recovery CD-DVD Creator
      to start the program.For Compaq computers, click Compaq
      and then click Compaq PC Recovery CD Creator
      to start the program.orClick Compaq
      , click Compaq PC Tools

      , and then click Recovery CD Creator
  4. When first opening the recovery CD-DVD creator program, a Welcome screen and Readme screen describe the operation of the software.Click the Continue
    button on each screen to start the disc creation process.
  5. A window displays listing the number of blank discs required to make a complete recovery set. Click Yes
    to continue.
  6. Label the blank discs appropriately, for example, Recovery Disc 1 of 8.
  7. Click Yes
    to continue. The Recovery CD Creator screen displays. While this screen is displayed, several processes take place:
      List Files -

      The program builds a list of the files needed.Collect file contents -
      The program collects needed files from the hidden recovery partition.Write files onto CD or DVD -
      The program is ready to burn the first disc.Verify CD or DVD contents -
      The program verifies the content of the discs.
  8. When the Write Files onto CDs process begins, insert Disc 1 of 8 (CD or DVD) into the CD-RW/DVD disc drive.
    Figure 1: Insert disc message
    Insert disc message

    NOTE: If the disc creation process is interrupted with one the following error messages, resolve the errors by searching for and downloading SP24057 software update from the

    HP Web site

    .CD\DVD image file exceeds 4457 MB Invalid Media
  9. After the write process is completed, the disc is verified and ejected. The write and verification processes take about 10 to 12 minutes for each CD-R disc and about 45 minutes for each DVD+R disc. When Disc 1 is verified, the door of the CD drive automatically opens. The software then collects the file contents for the next disc before accepting another disc.
    CAUTION: Do not insert the next blank disc until receiving an onscreen prompt. Inserting a disc and closing the drive tray before the prompt can result in a corrupt and unusable disc.
  10. When the prompt screen displays, insert the requested disc number. Continue the process until all discs are written to and verified. The Congratulations screen displays when a complete and valid set of recovery CDs is successfully created.
  11. If you do not have time to create all the discs, click Abort
    (see CAUTION below before aborting). The Recovery CD-DVD Creator software remembers where it stoppoed and continues at the same place the next time it is started.
    CAUTION: Aborting during the write process might result in a corrupted and unusable disc. Before aborting, wait until the disc has completed its write and verification process and prompts for the next disc.
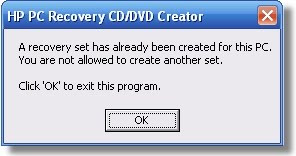
  12. If the Recovery CD Creator program is started again after a complete set of recovery CDs is created, another screen displays stating only one recovery set is allowed. The only choice is to click OK

    to exit the program. If you were unable to create one set of recovery discs and this message occurs, you must find or repair the discs that were previously made, find a new set of recovery discs that match the model of your computer, or install a new operating system.
    Figure 2: Recovery discs have already been created message
    Recovery set has already been created message
Creating a Recovery CD Set from a command prompt
Use the following steps to create a Recovery CD set without having Windows open:

NOTE: You can create only recovery CDs using this method. You cannot create recovery DVDs in a non-Windows environment.
  1. Turn on the computer and press the F10
    key repeatedly when the first screen displays.
  2. The first recovery screen displays. Do one of the following procedures depending on what is shown:
      Click Start

      , click PC Recovery
      , click Next
      , click OK
      , and then click Advanced Options
      .Click Advanced Options
      .
  3. Press and hold the Alt

    key, press the D
    key, and then release the keys.A window with a command prompt (C:\minint\system32) opens.

  4. If the computer does not have a memory card reader, type the following: d:
    If the computer has a memory card reader, type the following: h:
  5. Press Enter
    and type the following at the D:\> or H:\> prompt: cd windows
  6. Press Enter

    and type the following at the D:\Windows> or H:\Windows> prompt: cd creator
  7. Press Enter
    and type the following command exactly as it is shown here (including quotation marks and space): "CD Creator.exe"
  8. Press Enter

    and click Start Creation
    or NEXT
    (depending on your computer). If you do not see either of these selections, press the Enter
    key on the keyboard to start the Recovery CD Creator program.
  9. When the recovery CD creator program begins, follow the directions to create the Recovery CD set.
Additional questions and answers
QUESTION

: Why can only one set of recovery CDs be created?
ANSWER
: Because of licensing agreements with Microsoft, the recovery CD creator program allows only one complete set of recovery CDs to be created.
-
QUESTION
: What should be done if the program fails during the process?
ANSWER
: A failure might be caused by bad or poor quality media. Try writing to another disc from a different manufacturer.
-
QUESTION
: A friends computer has a bad hard drive and will not start. We have the identical computer model. Can I make a set of recovery discs on my computer and loan the recovery CDs to my colleague?
ANSWER

: Yes, this is possible, however, there are disadvantages:
    The original computer that created the recovery CDs can no longer create any more recovery CDs for itself (in case your colleague loses or damages your set of recovery CDs).The computer that was recovered with the set of CDs from the first computer will no longer be able to create a set of discs.
-
QUESTION
: Can the same set of recovery CDs be used on any other computer model?
ANSWER
: No, the recovery discs created on a particular computer can be used only on that same model computer.
-
QUESTION
: Why are rewritable discs unable to be used when making Recovery CDs or DVDs?
ANSWER
: Only one set of discs can be created. DVD+R or CD-R media must be used to prevent the possibility of successfully creating another disc over a previously copied disc, thus ruining the set of discs.
-
QUESTION

: What do I do when I receive an error message or error code?


မူရင္းလင့္
မူရင္းလင့္

Thursday, June 24, 2010

Saw Linux  /  12:50 AM  /    /  No comments
BIOS Setup Utility Information and Menu Options


ဒါကေတာ့ compaq, hp အမ်ိဳးအစားမ်ားအတြက္ BIOS Setup Utility Information
ေလ့လာႏိုင္ရန္ ဆိုက္တစ္ခုမွ စုစည္းတင္ျပထားျခင္းျဖစ္ပါတယ္။ သီးသန္႔ဘာသာျပန္ေရးမျပေတာ့ပါဘူး၊ ဒီမူရင္းဆုိက္ကိုေသခ်ာေလ့လာဖတ္ၾကည့္ျပီး အက်ိဳးရွိမွာေသခ်ာတယ္။

မူရင္းဆိုက္
http://h10010.www1.hp.com/ewfrf/wc/document?docname=bph07110&tmp_track_link=ot_recdoc/bph03792/en_us/bph07110/loc:1&lc=en&dlc=en&cc=us&product=1817054#N1424

Wednesday, June 23, 2010

Saw Linux  /  4:41 AM  /    /  No comments
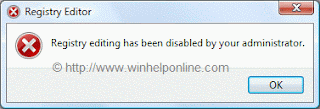
Error "Registry editing has been disabled by your administrator" when you open the Registry Editor in Windows Vista, 7

အထက္ပါ error မ်ိဳး ၾကံဳဖူးၾကပါလိမ့္မယ္။ ထို error မ်ိဳးကို ေျဖရွင္းဖို႔အတြက္ က်ေနာ္ဆိုက္တစ္ခုကေန
ရွာေပးလိုက္တယ္။ တင္ျပခ်က္လည္း ရွင္းတယ္။ English မူရင္းအတိုင္းပဲတင္ေပးလိုက္တယ္။ အဆင္ေျပ
လိမ့္မည္လို႔ေမွ်ာ္လင့္တယ္။


Resolution

If the above error message is shown in a standalone system, then it may be a result of Malware infection. It is also possible that the DisableRegistryTools policy had been enabled by a third-party tweak program which you may be using. It's highly advisable to follow up with a complete system checkup for Virus and Malware, especially when you're unsure about the cause.
Note: If your system is connected to a domain, your network administrator may have enabled the DisableRegistryTools Policy setting. In that case, you'll need to contact the network administrator to relax this restriction, if need be.
Method 1 - Using Group Policy Editor

If you are using an edition of Windows Vista (Windows Vista Business, Enterprise and Ultimate editions) which includes the Group Policy Editor, follow these steps:

* Click Start, type gpedit.msc in the Search box, and press ENTER
* Go to the following branch:

User Configuration | Administrative Templates | System

* Double-click Prevent access to registry editing tools
* Set it as Not Configured

Important: If it's already set to Not Configured, set it to Enabled and click Apply. Then repeat the steps and revert the setting back to Not Configured. This removes the registry based policy if set already.

Method 2

This method should work in all editions of Windows Vista.

* Download reg_enable.vbs attached at the end of this article, and save it to Desktop
* Open an elevated command prompt. To do this, click Start, click All Programs, click Accessories, right-click Command Prompt, and then click Run as administrator. If you are prompted for an administrator password or for a confirmation, type the password, or click Allow.
* Switch to your Desktop directory by typing the following command, and then pressing ENTER:

cd /d %userprofile%\desktop

* Then, type the following command and press ENTER

wscript.exe reg_enable.vbs

* Type EXIT to close the Command Prompt window.

If everything worked fine, the DisableRegistryTools policy should have been removed by now. See if you're able to launch Regedit.exe now.

မူရင္းလင့္

Tuesday, June 15, 2010

Saw Linux  /  6:13 PM  /    /  No comments
STOP: 0x0000007B (0xF78D2524, 0xC0000034, 0x00000000, 0x00000000) Blue Screen During Install Of Windows XP

ဟုတ္ကဲ့...၀င္းဒိုး Vista, 7 OS တင္ျပီးတဲ့ေနာက္ ၀င္းဒိုး xp ျပန္တင္တဲ့အခါ အထက္ပါ Blue Scream Error
မ်ိဳးၾကံဳဖူးပါလိမ့္မယ္။ အဲဒီျပႆနာကိုေျဖရွင္းဖို႔အတြက္ ေအာက္ပါပံုစံအတိုင္းစမ္းၾကည့္ေစခ်င္ပါတယ္။ က်ေနာ္ကေတာ့ မစမ္း
ၾကည့္ေသးေတာ့ အတိအက်အဆင္ေျပလား မေျပလား မေျပာႏိုင္ေသးဘူး။ ကြန္ပ်ဴတာျပႆနာမွန္သမွ် အင္တာနက္စာမ်က္
ႏွာစာၾကည့္လိုက္ရင္ အေတာ္မ်ားမ်ားအေျဖရႏိုင္ပါတယ္။

အဆင္ေျပပါေစ....


Over the weekend I helped remove Windows Vista from my friends Dell Latitude E4300. Since all the drivers were offered on their support site I downloaded the SATA driver, merged the driver into Windows XP SP2 using nLite, then started the reinstallation process. Just after copying files to the hard drive the laptop would crash into a blue screen with the following error; STOP: 0x0000007B (0xF78D2524, 0xC0000034, 0x00000000, 0x00000000). After scouring the web for fixes and trying many things that didn’t work, I finally came across a fix that allowed me to fully install Windows XP Pro SP2 onto a Dell Latitude E4300.

I resolved the stop issue by the following these steps.

1. During start up, when you see the Dell logo, press F2 to enter the BIOS

2. Expand the "Drives" section

3. Go to "SATA Operation"

4. Change this from "RAID AHCI" to "RAID ATA"

5. Exit BIOS saving changes

မူရင္းလင့္

Blue Screen Error Code

သင့္ရဲ႕ စက္မွာတစ္ခါတစ္ေလ ေပၚတတ္တဲ့ Blue Screen Error အေၾကာင္းေလးပါ။ windows တြင္ blue screen error တက္ရင္ေပၚေသာစာသားမ်ားကုိမွတ္ျပီးဘယ္ complement က errors တက္တယ္ဆုိတာကုိ သိႏိုင္ပါတယ္။ erros တက္ရင္ေပၚေသာcodeမ်ားျဖစ္ပါတယ္။
1xxxxx-----Motherboard errors
2xxxxx-----main memory errors
3xxxxx-----keyboard errors
5xxxxx-----color graphic adapter errors
6xxxxx-----Floppy disk controller errors
14xxxx-----Printer errors
17xxxxx---hard drive controller errors
86xxxxx----Mouse errors
Blue Screen Error ေပၚလာၿပီး ကၽြန္ေတာ္လို ဘာမွန္းမသိေသးသူမ်ားအတြက္ပါ။

source : kozaw

Blue Screen of Death (BSoD) ဘာေၾကာင့္ျဖစ္ရတာလဲ

ကြ်န္ေတာ္တို့ တစ္ခါတစ္ေလမွာ computer အသံုးျပဳေနရင္ အျပာေရာင္ screen ၾကီးေပၚလာျပီးဘာမွ ဆက္လုပ္လို့မရေတာ့တာမ်ိဳး ေတြဖူးမွာပါ ။ အဲဒါကို Blue Screen of Death (BSoD) လို့ေခၚပါတယ္ ။
အဲဒီ (BSoD) ဘာေၾကာင့္ျဖစ္ရလဲဆိုရင္ (ေတာ္ေတာ္မ်ားမ်ားကေတာ့ Memory error ေၾကာင့္လို့ ေျပာက်ပါတယ္)။ တကယ္ေတာ့ (BSoD) Blue Screen error ျဖစ္ရတဲ့အေၾကာင္းအရင္းအမ်ားၾကီးရီွပါ ။

အဲဒီ Blue Screen ၾကီးရဲ့ဖန္တီးရွင္ကေတာ့ Microsoft ရဲ့ Window Operating System ပါဘဲ။
Window Operating System ဟာ System error ေတြကရုန္းမထြက္ႏုိင္တဲ့အခါ System Error ေတြကို recover မလုပ္ႏုိင္ေတာ့တဲ့အခါမ်ိဳးမွာ ေပၚလာတာျဖစ္ပါတယ္ ။ Blue Screen ကို Microsoft Window Version 3.1 တည္းကစတင္ပါ၀င္လာပါတယ္ ။ Window Vista ရဲံ ကနဦး Versions မွာ Boot Loader Error ကို (RSoD) Red Screen of Death နဲ့ျပပါတယ္ ။
Drive တစ္ခုဟာ Kernal Mode မွာအလုပ္လုပ္ေနစဥ္ system error ေတြကို recover မလုပ္ႏိုင္ တဲ့အခ်ိန္မွာ Blue Screen Error ျဖစ္ေပၚႏုိင္ပါတယ္ ။ အဲဒီလို့ျဖစ္ရင္ Window ကို Restate လုပ္ေပးျခင္းကေကာင္းဆံုးျဖစ္ပါတယ္ ။ Blue Screen ေပၚမွာျပထားတဲ့စာသားေတြက Software Engineer ေတြအတြက္ error fix လုပ္ႏုိင္ဖုို့ေဖၚျပထားတဲ့စာသားေတြပါ ။ eg.(0x0000001E -KMODE -EXCEPTION -NOT-LIANDLED )ဆိုတဲ့စာသားမ်ိဳးေတြပါ ။ အဲဒီစာသားေတြထဲမွာ error ျဖစ္ေနတဲ့ Address ကို ေဖာ္ျပေပးပါတယ္ ။အဲဒီမွာerror ျဖစ္ေနတဲ့ Driver ကိုပါျပေပးပါတယ္ ။
အမ်ားေသာအားျဖင့္ window တိုင္းဟာ Default အားျဖင့္ (BSoD)ျဖစ္တာနဲ့ Memory Dump လုပ္ပါတယ္ ။ Memory dump ဆိုတာ Physical Memory ထဲရီွေၾကာင္းအရာအားလံုးကို Copy ကူးတာပါ ။Operating System version ေပၚမူတည္ျပီ Dump လုပ္တဲ့ format လည္းအမ်ိုဳးမ်ိဳးရွိႏိုင္ပါတယ္ ။
Dump လုပ္လို့ရလာတဲ့ file ကို Kernal debugger နဲ့ debugged လုပ္လို့ရပါတယ္ ။ဘာျဖစ္လို့လဲဆိုေတာ့
Blue Screen မွ ျပထားတဲ့စာသားေတြမွာ ကန့္သတ္ခ်က္ရွိလို့ပါ ။ သူျပတဲ့error နဲ့ တကယ္ျဖစ္ေနတဲ့ error နဲ့က ကြဲလြဲေနႏိုင္ပါတယ္ ။အဲဒီေတာ့ debugger နဲ့ trace လိုက္ရမွာပါ ။ Debugger ကို Microsoft က ေန free download ရႏုိင္ပါတယ္။
(BSoD) ဟာ Boot Loader error ေၾကာင့္လည္းျဖစ္ႏိုင္ပါတယ္ ။ အဲဒီလိုအခ်ိန္မွာ Hard drive လည္း အသံုးျပဳလို့မရေသးတာေၾကာင့္ Memory Dump လည္းလုပ္လို့မရပါဘူး ။ window CD နဲ့ Boot တက္ျပီး error fix လုပ္ရမွာျဖစ္ပါတယ္ ။
ေနာက္ထပ္ (BSoD) ျဖစ္ရတဲ့အေၾကာင္း ကေတာ့ DLL fileေတြCompatibalမျဖစ္လို့ပါ ။ Application program ေတြမွာ DLL file ေတြလိုအပ္တဲ့အခါ DLL file ေတြကို window က Memory ေပၚကို လွမ္းတင္ပါတယ္။ အဲဒီမွာ Application version ေျပာင္းထားတာတို့ ။ DLL ႏွင့္ version မတူတာတို့ဆိုရင္ လဲ (BSoD) ျဖစ္ႏို္င္ပါတယ္ ။
ဘယ္windows မွာဘဲျဖစ္ျဖစ္ အထက္ပါအေၾကာင္းမ်ားေၾကာင့္ (BSoD) ျဖစ္ႏိိုင္သလိုတစ္ျခားေတြေၾကာင့္လဲ ျဖစ္ႏိုင္ပါတယ္ ။ Virus ေၾကာင့္လဲ (BSoD) ျဖစ္ႏုိင္ပါတယ္။ Memory Compatible မျဖစ္လုို့ ဒါမွမဟုတ္ Bad Memory ေတြေၾကာင့္လဲ ျဖစ္ႏိုင္ပါတယ္ ။တစ္ျခားအေၾကာင္းအရာေတြေၾကာင့္(BSoD) ျဖစ္ႏိုင္ပါတယ္ ။

အားလံုးေသာဘ၀မ်ားျငိမ္းခ်မ္းေပ်ာ္ရႊင္ၾကပါေစ ။
Fef: Kosithu
Saw Linux  /  6:13 PM  /    /  No comments
STOP: 0x0000007B (0xF78D2524, 0xC0000034, 0x00000000, 0x00000000) Blue Screen During Install Of Windows XP

ဟုတ္ကဲ့...၀င္းဒိုး Vista, 7 OS တင္ျပီးတဲ့ေနာက္ ၀င္းဒိုး xp ျပန္တင္တဲ့အခါ အထက္ပါ Blue Scream Error
မ်ိဳးၾကံဳဖူးပါလိမ့္မယ္။ အဲဒီျပႆနာကိုေျဖရွင္းဖို႔အတြက္ ေအာက္ပါပံုစံအတိုင္းစမ္းၾကည့္ေစခ်င္ပါတယ္။ က်ေနာ္ကေတာ့ မစမ္း
ၾကည့္ေသးေတာ့ အတိအက်အဆင္ေျပလား မေျပလား မေျပာႏိုင္ေသးဘူး။ ကြန္ပ်ဴတာျပႆနာမွန္သမွ် အင္တာနက္စာမ်က္
ႏွာစာၾကည့္လိုက္ရင္ အေတာ္မ်ားမ်ားအေျဖရႏိုင္ပါတယ္။

အဆင္ေျပပါေစ....


Over the weekend I helped remove Windows Vista from my friends Dell Latitude E4300. Since all the drivers were offered on their support site I downloaded the SATA driver, merged the driver into Windows XP SP2 using nLite, then started the reinstallation process. Just after copying files to the hard drive the laptop would crash into a blue screen with the following error; STOP: 0x0000007B (0xF78D2524, 0xC0000034, 0x00000000, 0x00000000). After scouring the web for fixes and trying many things that didn’t work, I finally came across a fix that allowed me to fully install Windows XP Pro SP2 onto a Dell Latitude E4300.

I resolved the stop issue by the following these steps.

1. During start up, when you see the Dell logo, press F2 to enter the BIOS

2. Expand the "Drives" section

3. Go to "SATA Operation"

4. Change this from "RAID AHCI" to "RAID ATA"

5. Exit BIOS saving changes

မူရင္းလင့္

Blue Screen Error Code

သင့္ရဲ႕ စက္မွာတစ္ခါတစ္ေလ ေပၚတတ္တဲ့ Blue Screen Error အေၾကာင္းေလးပါ။ windows တြင္ blue screen error တက္ရင္ေပၚေသာစာသားမ်ားကုိမွတ္ျပီးဘယ္ complement က errors တက္တယ္ဆုိတာကုိ သိႏိုင္ပါတယ္။ erros တက္ရင္ေပၚေသာcodeမ်ားျဖစ္ပါတယ္။
1xxxxx-----Motherboard errors
2xxxxx-----main memory errors
3xxxxx-----keyboard errors
5xxxxx-----color graphic adapter errors
6xxxxx-----Floppy disk controller errors
14xxxx-----Printer errors
17xxxxx---hard drive controller errors
86xxxxx----Mouse errors
Blue Screen Error ေပၚလာၿပီး ကၽြန္ေတာ္လို ဘာမွန္းမသိေသးသူမ်ားအတြက္ပါ။

source : kozaw

Blue Screen of Death (BSoD) ဘာေၾကာင့္ျဖစ္ရတာလဲ

ကြ်န္ေတာ္တို့ တစ္ခါတစ္ေလမွာ computer အသံုးျပဳေနရင္ အျပာေရာင္ screen ၾကီးေပၚလာျပီးဘာမွ ဆက္လုပ္လို့မရေတာ့တာမ်ိဳး ေတြဖူးမွာပါ ။ အဲဒါကို Blue Screen of Death (BSoD) လို့ေခၚပါတယ္ ။
အဲဒီ (BSoD) ဘာေၾကာင့္ျဖစ္ရလဲဆိုရင္ (ေတာ္ေတာ္မ်ားမ်ားကေတာ့ Memory error ေၾကာင့္လို့ ေျပာက်ပါတယ္)။ တကယ္ေတာ့ (BSoD) Blue Screen error ျဖစ္ရတဲ့အေၾကာင္းအရင္းအမ်ားၾကီးရီွပါ ။

အဲဒီ Blue Screen ၾကီးရဲ့ဖန္တီးရွင္ကေတာ့ Microsoft ရဲ့ Window Operating System ပါဘဲ။
Window Operating System ဟာ System error ေတြကရုန္းမထြက္ႏုိင္တဲ့အခါ System Error ေတြကို recover မလုပ္ႏုိင္ေတာ့တဲ့အခါမ်ိဳးမွာ ေပၚလာတာျဖစ္ပါတယ္ ။ Blue Screen ကို Microsoft Window Version 3.1 တည္းကစတင္ပါ၀င္လာပါတယ္ ။ Window Vista ရဲံ ကနဦး Versions မွာ Boot Loader Error ကို (RSoD) Red Screen of Death နဲ့ျပပါတယ္ ။
Drive တစ္ခုဟာ Kernal Mode မွာအလုပ္လုပ္ေနစဥ္ system error ေတြကို recover မလုပ္ႏိုင္ တဲ့အခ်ိန္မွာ Blue Screen Error ျဖစ္ေပၚႏုိင္ပါတယ္ ။ အဲဒီလို့ျဖစ္ရင္ Window ကို Restate လုပ္ေပးျခင္းကေကာင္းဆံုးျဖစ္ပါတယ္ ။ Blue Screen ေပၚမွာျပထားတဲ့စာသားေတြက Software Engineer ေတြအတြက္ error fix လုပ္ႏုိင္ဖုို့ေဖၚျပထားတဲ့စာသားေတြပါ ။ eg.(0x0000001E -KMODE -EXCEPTION -NOT-LIANDLED )ဆိုတဲ့စာသားမ်ိဳးေတြပါ ။ အဲဒီစာသားေတြထဲမွာ error ျဖစ္ေနတဲ့ Address ကို ေဖာ္ျပေပးပါတယ္ ။အဲဒီမွာerror ျဖစ္ေနတဲ့ Driver ကိုပါျပေပးပါတယ္ ။
အမ်ားေသာအားျဖင့္ window တိုင္းဟာ Default အားျဖင့္ (BSoD)ျဖစ္တာနဲ့ Memory Dump လုပ္ပါတယ္ ။ Memory dump ဆိုတာ Physical Memory ထဲရီွေၾကာင္းအရာအားလံုးကို Copy ကူးတာပါ ။Operating System version ေပၚမူတည္ျပီ Dump လုပ္တဲ့ format လည္းအမ်ိုဳးမ်ိဳးရွိႏိုင္ပါတယ္ ။
Dump လုပ္လို့ရလာတဲ့ file ကို Kernal debugger နဲ့ debugged လုပ္လို့ရပါတယ္ ။ဘာျဖစ္လို့လဲဆိုေတာ့
Blue Screen မွ ျပထားတဲ့စာသားေတြမွာ ကန့္သတ္ခ်က္ရွိလို့ပါ ။ သူျပတဲ့error နဲ့ တကယ္ျဖစ္ေနတဲ့ error နဲ့က ကြဲလြဲေနႏိုင္ပါတယ္ ။အဲဒီေတာ့ debugger နဲ့ trace လိုက္ရမွာပါ ။ Debugger ကို Microsoft က ေန free download ရႏုိင္ပါတယ္။
(BSoD) ဟာ Boot Loader error ေၾကာင့္လည္းျဖစ္ႏိုင္ပါတယ္ ။ အဲဒီလိုအခ်ိန္မွာ Hard drive လည္း အသံုးျပဳလို့မရေသးတာေၾကာင့္ Memory Dump လည္းလုပ္လို့မရပါဘူး ။ window CD နဲ့ Boot တက္ျပီး error fix လုပ္ရမွာျဖစ္ပါတယ္ ။
ေနာက္ထပ္ (BSoD) ျဖစ္ရတဲ့အေၾကာင္း ကေတာ့ DLL fileေတြCompatibalမျဖစ္လို့ပါ ။ Application program ေတြမွာ DLL file ေတြလိုအပ္တဲ့အခါ DLL file ေတြကို window က Memory ေပၚကို လွမ္းတင္ပါတယ္။ အဲဒီမွာ Application version ေျပာင္းထားတာတို့ ။ DLL ႏွင့္ version မတူတာတို့ဆိုရင္ လဲ (BSoD) ျဖစ္ႏို္င္ပါတယ္ ။
ဘယ္windows မွာဘဲျဖစ္ျဖစ္ အထက္ပါအေၾကာင္းမ်ားေၾကာင့္ (BSoD) ျဖစ္ႏိိုင္သလိုတစ္ျခားေတြေၾကာင့္လဲ ျဖစ္ႏိုင္ပါတယ္ ။ Virus ေၾကာင့္လဲ (BSoD) ျဖစ္ႏုိင္ပါတယ္။ Memory Compatible မျဖစ္လုို့ ဒါမွမဟုတ္ Bad Memory ေတြေၾကာင့္လဲ ျဖစ္ႏိုင္ပါတယ္ ။တစ္ျခားအေၾကာင္းအရာေတြေၾကာင့္(BSoD) ျဖစ္ႏိုင္ပါတယ္ ။

အားလံုးေသာဘ၀မ်ားျငိမ္းခ်မ္းေပ်ာ္ရႊင္ၾကပါေစ ။
Fef: Kosithu

Sunday, June 13, 2010

Saw Linux  /  5:13 AM  /  ,   /  No comments
Fedora & Ubuntu
Fedora က သူ႕ကို အရင္ဆံုး New Partition (ဘာ format မွမလုပ္ထားေပးလဲရတယ္၊ ntfs ပဲျဖစ္ျဖစ္၊ ext3 ပဲျဖစ္ျဖစ္၊ blank partition ပဲျဖစ္ျဖစ္ေပါ႔) ခြဲထားေပးရင္ႀကိဳက္တယ္။ အဲဒီ ေပၚမွာ သူေကာင္းေကာင္းသြင္းေပးႏိုင္ပါတယ္၊ သူ႔အတြက္လံုေလာက္တဲ႔ space ရွိရင္ေပါ႔ .. ခြဲဖို႔ရာ လဲ Partition magic ပဲသံုးသံုး၊ Gparted Live CD ပဲသံုးသံုးရပါတယ္ .. သူ႔အတြက္ အရင္ဆံုး Free Space လုပ္ထားေပးရင္ လံုေလာက္တယ္ ..
Ubuntu ကအဲလို မဟုတ္ျပန္ဘူး၊ သူ႔ကို C: drive မွာ သူ႔အတြက္ Partition လုပ္ထားေပးရင္ သူသိပ္နားမလည္ေသးဘူးထင္တယ္ အဲဒီအေပၚမွာတူမေနပဲ .. Windows နဲ႔ကပ္ရပ္ side by side ေနခ်င္တယ္ .. သူ႔ဟာသူ သူ႔အတြက္ Partition ကိုသူ႔ Installer နဲ႔ ကိုယ္တိုင္ခြဲခ်င္တယ္.

ဥပမာ
|-----------windows--------------------|----free partition for ubuntu------| လို႔
ခြဲထားေပးရင္ေတာင္ သူ႔က ေအာက္ကအတုိင္းေနခ်င္တယ္..
|-----win--------------|---ubuntu------|----free partition for ubuntu------|

အဲလို Ubuntu ရဲ႕ installer က ျဖစ္ေနတက္လို႔ Ubuntu အတြက္ Free Partition လုပ္စရာမလိုဘူးလို႔ အၾကံေပးခ်င္ပါတယ္ ..
ဥပမာ
|-----------C: (Windows)-------------------------------|--D: (recovery)----|
ဒီလိုရွိေနရင္ Ubuntu Installer နဲ႔ သြင္းၾကည့္လိုက္ရင္ ေအာက္ကလိုျပလာမယ္ ..
|----------C: (Win)------------|------ubuntu-----------|--D: (recovery)-----|

အဲဒီေတာ႔ windows နဲ႔ side by side ကို ubuntu ေနမယ္လို႔ ubuntu installer ကေျပာလာလိမ္႔မယ္ေလ .. အဲဒီအခါက်မွာ Resize ေလးၾကည့္လုပ္ေပးလိုက္ရင္ OK သြားမယ္ ..

အကယ္လို႔ Ubuntu release အသစ္ေပၚလာလို႔ fresh install လုပ္ခ်င္လို႔ရွိရင္ ubuntu partition ကို Gparted Live CD နဲ႔ delete လုပ္ၿပီး C: drive ကို နဂိုကအတိုင္း resize ျပန္လုပ္ေပးလိုက္ .. ၿပီးရင္ mbr ကို fix လုပ္ေပးလိုက္ရင္ နဂိုအတိုင္း ေအာက္ကလို ..

|-----------C: (Windows)-------------------------------|--D: (recovery)----|

ျပန္ရလာမယ္ .. အဲဒီလိုနဲ အေပၚကနည္းအတုိင္း ubuntu new release ကို fresh install လုပ္လို႕ရပါၿပီ ..

က်ေနာ္ေျပာတာနဲ႔တင္ ျပန္ၿပီး လည္ထြက္သြားမလားမသိဘူး။ :D

Ref: မူရင္းလင့္

Saturday, June 12, 2010

Saw Linux  /  1:05 AM  /    /  No comments
ေစာလင္းနက္စ္


မိမိကြန္ပ်ဴတာမွာ uvPL.exe Aplication error ျဖစ္ေပၚခဲ့ရင္ RegistryBooster scan
ေဆာ့၀ဲျဖင့္ ေျဖရွင္းႏိုင္ပါတယ္။ ၎RegistryBooster scanေဆာ့၀ဲကို ေဒါင္းျပီး အင္စေတာေမာင္း
ပါ။ ျပီးရင္ Automatic scan ဖတ္ပါလိမ့္မယ္။
အားလံုးျပီးရင္ ကြန္ပ်ဴတာကို restart ခ်ပါ။ ၎ေဆာ္၀ဲကိုျပန္ျပီး Unistall လုပ္လိုက္ပါ။ မထုတ္
ခ်င္ရင္လဲ ရပါတယ္။

Download Link:
RegistryBooster scan
မူရင္းလင့္

Tuesday, June 8, 2010

Saw Linux  /  2:03 AM  /    /  No comments
1. Press Start and select Run
2. Type CMD and press Enter (or if you use Windows ME, type COMMAND)
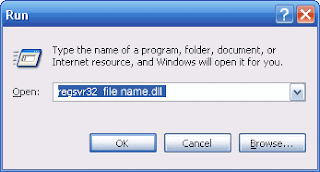
3. Type regsvr32 Wt9_1ldaf.dll and press Enter

* To install the dll files, type: regsvr32 Wt9_1ldaf.dll
* To uninstall the dll files, type: regsvr32 -u Wt9_1ldaf.dll
install or uninstall Wt9_1ldaf.dll DLL


4. In the end, you should receive a message saying that your file was successfully installed or uninstalled.

မူရင္းလင့္

Sunday, June 6, 2010

Saw Linux  /  7:49 PM  /    /  No comments
ေစာလင္းနက္စ္


USB နဲ႔ ပတ္သက္တဲ့ virus အတြက္ ကာကြယ္ေပးတဲ့အေကာင္းဆံုး ေဆာ့ဖ္တ္၀ဲ
တစ္ခုျဖစ္ပါတယ္။ လုိခ်င္သူမ်ားအတြက္ ေအာက္ပါလင့္အတိုင္းေဒါင္းႏိုင္ပါတယ္။
ဇစ္ဖိုင္နဲ႔တင္ထားျပီး အင္စေတာ့လဲလြယ္ပါတယ္။

Download Links

Mediafire

မူရင္းလင့္
Saw Linux  /  7:49 PM  /    /  No comments
ေစာလင္းနက္စ္


USB နဲ႔ ပတ္သက္တဲ့ virus အတြက္ ကာကြယ္ေပးတဲ့အေကာင္းဆံုး ေဆာ့ဖ္တ္၀ဲ
တစ္ခုျဖစ္ပါတယ္။ လုိခ်င္သူမ်ားအတြက္ ေအာက္ပါလင့္အတိုင္းေဒါင္းႏိုင္ပါတယ္။
ဇစ္ဖိုင္နဲ႔တင္ထားျပီး အင္စေတာ့လဲလြယ္ပါတယ္။

Download Links

Mediafire

မူရင္းလင့္

Thursday, June 3, 2010

Saw Linux  /  5:28 PM  /  ,   /  No comments
Ref: http://www.ubuntu-myanmar.org/

Gtalk မွ သူငယ္ခ်င္း ေမာင္ေမာင္ျပည့္ၿဖိဳး က ေမးလာပါတယ္။ Ubuntu 10.04 ေပၚမွာ ေဇာ္ဂ်ီဖြန္႔ သြင္းလို႔ မရျဖစ္ေနပါတယ္တ့ဲ။

ေနာက္ Terminal က ဖြန္႔ Install လုပ္ေနတ့ဲ ပံုကိုလည္း Screen Shoot ဖတ္ျပီး တြဲပို႔လာပါတယ္။

ပံုစက္မွာ ဒီလိုျမင္ေနရပါတယ္။


Ubuntu 10.04 တြင္ ေဇာ္ဂ်ီဖြန္႔ Install ျပဳလုပ္ေနစဥ္အတြင္း Error ျပျခင္း

Ubuntu 10.04 တြင္ ေဇာ္ဂ်ီဖြန္႔ Install ျပဳလုပ္ေနစဥ္အတြင္း Error ျပျခင္း

ကိုေမာင္ေမာင္ျပည့္ျဖိဳး စက္မွာ ျဖစ္ေနတာကို ရွင္းမျပေတာ့ပဲ အလြယ္ဆံုးနည္းကို လမ္းညႊန္ေဖာ္ျပ ေပးပါမယ္။
zawgyi_keyboard-0.3.3.tar.gz
အခု ေဖာ္ျပတ့ဲ ေဇာ္ဂ်ီဖြန္႔ သြင္းနည္းကို ေရးသားသူကေတာ့ box02

(thebox02 @gmail.com) ျဖစ္ပါတယ္။

အဆင့္ ၁။ အေပၚလင့္ကေန ေဇာ္ဂ်ီဖြန္႔ကို Download လုပ္ပါ။

အဆင့္ ၂။ ေနာက္ Download လုပ္လို႔ ရတ့ဲ ဖိုင္ေလးကို Desktop ေပၚမွာ တင္ထားပါ။

အဆင့္ ၃။ Terminal ကိုဖြင့္ပါ။

အဆင့္ ၄။ $ cd ~/Desktop ကို ပထမဆံုး ရိုက္ထည့္ပါတယ္။

အဆင့္ ၅။ $ ls ကို ရိုက္ထည့္ပါမယ္။ (အယ္ အက္စ္ ျဖစ္ပါတယ္။)

အဆင့္ ၆။ $ tar xzf zawgyi_keyboard-0.3.3.tar.gz

အဆင့္ ၇။ $ ls

အဆင့္ ၈။ $ cd zawgyi့

အဆင့္ ၉။ $ sudo python zawgyi_keyboard.py

ေနာက္ဆံုး Command ေတြအလုပ္ လုပ္ပါလိမ့္မယ္။

သင့္အေနနဲ႔ လိုအပ္တာကို လိုက္လုပ္ေပးဖို႔ လိုပါလိမ့္မယ္။ ဥပမာ ဖြန္႔အင္စေတာ လုပ္ရန္ i

ကို ရိုက္ထည့္ ေပးရလိမ့္မယ္။ ေနာက္ဆံုး Terminal ကို ျပန္ပိတ္ရန္ q ကို ရိုက္ထည့္ေပးရပါမယ္။
---------------

အေပၚက ေရးထားတ့ဲ အဆင့္မ်ား သိပ္ျပီး ျပည့္စံုမႈ မရွိပါဘူး။


ဒီဖိုင္ကို Download လုပ္ျပီး ေသခ်ာဖတ္ျပီး Install လုပ္ေစခ်င္ပါတယ္။ စာလံုးမ်ား အေသးအႀကီး အစစ


သတိထားျပီး ေသခ်ာ ရိုက္ေစခ်င္ပါတယ္။ က်ေနာ္ ကေတာ့ Ubuntu 9.10 မွာေရာ 10.04 မွာပါ အခုနည္းနဲ႔


အဆင္ေျပစြာ Install လုပ္ျဖစ္ခ့ဲပါတယ္။


————


Ubuntu အတြက္ ျမန္မာဖြန္႔သြင္းနည္းမ်ား ေဖာ္ျပထားတ့ဲ ဆိုဒ္မ်ားကို ေအာက္မွာ ေဖာ္ျပထားပါတယ္။


http://code.google.com/p/zawgyi-keyboard/downloads/list?q=label:Featured


http://box02.my-mm.org/2010/02/ubuntu-linux.html

Wednesday, June 2, 2010

Saw Linux  /  10:23 PM  /  ,   /  No comments
ျမန္မာဖြန္႔အတြက္ ႀကိဳက္ႏွစ္သက္ရာဖြန္႔ကို Ubuntu Linux မွာ Install လုပ္နိုင္ပါတယ္။ ဒီ guide မွာ ေဇာ္ဂ်ီဖြန္႔ကို ဥပမာနမူနာထားၿပီး သြင္းမွာျဖစ္ပါတယ္။

ေဇာ္ဂ်ီဖြန္႔နဲ႔ Install script အထုတ္အပိုးကိုရယူျခင္း
အရင္ဆုံး zawgyi-keyboard.googlecode.com မွာ သြားၿပီး zawgyi-keyboard package ကို download လုပ္ပါ။


zawgyi-keyboard package ျဖစ္တဲ့ latest version : zawgyi_keyboard-0.3.3.tar.gz ကိုရယူလိုက္ပါ။ ၿပီးရင္ အဲဒီ package ကို ကိုယ့္ရဲ့ Desktop ေပၚမွာထားလိုက္ပါ။

Install Script ႏွင့္ ေဇာွဂ်ီဖြန္႔ ေဇာွဂ်ီကီးဘုတ္ သြင္းျခင္း

Terminal ကိုဖြင့္ပါ။ Terminal က Applications > Accessories > Terminal မွာပါ။


Terminal က ေအာက္ကလိုပြင့္လာမယ္။


Terminal ကိုဖြင့္ရတဲ့အေၾကာင္းရင္းက က်ေနာ္တို႔ command line နဲ႔ zawgyi keyboard ကို install လုပ္မလို႔ပါ။ command line ဆိုလို႔ ခက္ခက္ခဲခဲ command ေတြ မွတ္သားထားရမယ္လို႔ သိရမယ္လို႔ မထင္ လိုက္ပါနဲ႔။ ခုသုံးမယ့္ commands ေတြက တကယ့္ child play ေတြပါ။ copy'n'paste လုပ္ၿပီး သြားလဲရပါတယ္။
အခု က်ေနာ္တို႔ Terminal ကေန zawgyi-keyboard package ထားရွိရာ Desktop ဆိုတဲ့ ေနရာကိုသြားရေအာင္ cd လို႔ေခၚတဲ့ (change directory) command ကိုသုံးပါမယ္။ Terminal ထဲမွာ ေအာက္က command line ကို copy'n'paste လုပ္ေပးလိုက္ပါ။ command ေရွ႕က $ (dollar sign) ကို copy လုပ္စရာမလိုဘူးေနာ္။

$ cd ~/Desktop

ခုဆိုရင္ က်ေနာ္တို႔ စိတ္ထဲက virtual နည္းနဲ႔ Terminal ကေန Desktop ဆိုတဲ့ေနရာကိုေရာက္ပါၿပီ။ က်ေနာ္တို႔ ls ဆိုတဲ့ (list) command ကိုဆက္သုံးၿပီး Desktop ေပၚမွာေရာ ကိုယ္ထားတဲ့ zawgyi-keyboard package ရွိ မရွိကို ျပန္စမ္းစစ္ၾကည့္တဲ့သေဘာပါ။

$ ls

ls ဆိုတာက list ဆိုတဲ့ သေဘာကိုေဆာင္တဲ့အတြက္ Desktop ေပၚမွာရွိသမၽွ files, pictures စတာေတြကို list လုပ္သလိုေဖာ္ျပေပးမွာပါ။ က်ေနာ္တို႔ထားထားတဲ့ zawgyi_keyboard-0.3.3.tar.gz ရွိတယ္ဆိုပါေတာ့ ကဲ ဘာဆက္လုပ္ရမလဲ? အဲဒီ package က tar ဆိုတဲ့ program ငယ္နဲ႔ ခ်ဳံ႕ထားတဲ့အတြက္ က်ေနာ္တို႔ အဲဒါကို ျပန္ျဖည္ေပးဖို႔လိုအပ္တယ္။ ဒါမွ အထဲမွာ ဘာရွိလဲဆိုတာ သိနိုင္မွာပါ။ အထဲကဟာေတြ ဘာေတြလဲ သိမွ ဆက္ၿပီး အလုပ္လုပ္လို႔ရမွာပါ။ ေအာက္က command ကို ကိုယ့္ရဲ့ Terminal ထဲမွာ copy'n'paste လုပ္ၿပီး Enter ေခါက္ၿပီး run လိုက္ပါ။

$ tar xzf zawgyi_keyboard-0.3.3.tar.gz

ဒီ command line မွာ tar ဆိုတာက zip program လိုမ်ိဳး ဖိုင္ေတြကို achive, extract လုပ္ေပးတဲ့ Unix & Unix-Like system ေတြမွာ အသုံးမ်ားတဲ့ program ငယ္ပါ။ xzf ဆိုတာက options ေတြပါ။ options တစ္ခုခ်င္းစီရဲ့လုပ္ေဆာင္ခ်က္ကို သိခ်င္ရင္ ဒီ $ tar -h ဒါမွမဟုတ္ $ tar --help ကို Terminal ထဲရိုက္ၿပီး ၾကည့္လိုက္ပါ။ ေနာက္တမ်ိဳးက man ဆိုတဲ့ program နဲ႔လဲ သက္ဆိုင္ရာ program ေတြရဲ့ manual pages ေတြကို ၾကည့္လို႔ရပါေသးတယ္။ ဥပမာ $ man tar လို႔ Terminal ထဲမွာရိုက္ၿပီး tar program ရဲ့ manual ကို ၾကည့္နိုင္ပါေသးတယ္။ ဒီေနရာမွာ ၾကားျဖတ္ေျပာရမယ္ဆိုရင္ tar xzf zawgyi လို႔ Terminal ထဲမွာရိုက္ၿပီးခ်ိန္မွာ keyboard ေပၚက Tab key ကိုေခါက္ၾကည့္ပါ။ Bash Shell ရဲ့ autocomplete က ေနာက္ကဆက္လိုက္ပါလာတဲ့ _keyboard-0.3.3.tar.gz ကို သူ႔ဟာသူျဖည့္သြားေပးမွာပါ။ ဒီလိုဆိုရင္ command line ကို type ရတာလဲ သက္သာၿပီး အမွားလဲ နည္းနိုင္ပါတယ္။ ခဏကေျပာတဲ့ Bash Shell ဆိုတာက Bourne-again Shell ပါ။ Linux Distributions ေတြတိုင္းမွာလိုလို Default shell အေနနဲ႔ပါလာတက္ပါတယ္။ Ubuntu Linux မွာက Definitely အဲဒီ shell ကိုအသုံးျပဳပါတယ္။
ကဲ tar ball ျဖည္ၿပီးရင္ ဘာဆက္လုပ္ရမလဲ? က်ေနာ္တို႔ ls ကိုသုံးၿပီး Desktop ေပၚမွာ ဘာေတြျဖစ္ပ်က္သြားလဲ ၾကည့္ရေအာင္ Terminal ထဲမွာ ls ကို ရိုက္ထည့္ၿပီး Enter ေခါက္ၾကည့္ရေအာင္..

$ ls

ဘာေတြ႕မလဲဆိုေတာ့ zawgyi ဆိုတဲ့ folder တစ္ခုတိုးလာတဲ့အတြက္ zawgyi ဆိုတာကိုေတြ႕လိမ့္မယ္။
ဟုတ္မဟုတ္ ကိုယ့္ Desktop ကို ျပန္ၾကည့္နိုင္တယ္။ zawgyi folder ကိုေတြ႕မွာပါ။ က်ေနာ္တို႔ zawgyi folder ထဲကို Terminal ထဲကေန ေအာက္က command သုံးၿပီး ဆက္ဝင္ရေအာင္ ..

$ cd zawgyi

Terminal ကေနဘာ error မွ မျပဘူးဆိုရင္ က်ေနာ္တို႔ zawgyi folder ထဲေရာက္သြားပါၿပီး။ zawgyi folder ထဲမွာ ဘာေတြပါလဲဆိုတာ ls နဲ႔ က်ေနာ္တို႔ ထပ္ၾကည့္ပါအုံးမယ္။

$ ls

ေအာက္ကပုံကိုၾကည့္ပါ။ ခင္ဗ်ားနဲ႔ Terminal ထဲမွာလဲ ေအာက္ကပုံနဲ႔ဆင္တူေတြ႕မွာပါ။ Desktop ေပၚမွာလဲ zawgyi folder ထြက္လာတာကိုလဲေတြ႕မွာပါ။


ဒီအဆင့္ေရာက္ၿပီးဆိုရင္ေတာ့ က်ေနာ္တို႔ installation ကို စတင္လုပ္ေတာ့မွာပါ။ ဒီ package မွာ အားလုံးလြယ္ကူေစဖို႔အတြက္ ေဇာ္ဂ်ီဖြန္႔ေရာ လိုအပ္တဲ့ဖိုင္ေတြေရာ python script ေရာထည့္ထားေပးပါတယ္။ ခင္ဗ်ားက ထည့္ထားေပးတဲ့ zawgyi_keyboard.py ဆိုတဲ့ python script ကို run ၿပီး install လုပ္တာတို႔ remove လုပ္တာတို႔ font upgrade လုပ္တာတို႔ လုပ္နိုင္ပါတယ္။ အရင္ဆုံးအဲဒီ script ကို run ရေအာင္ ေအာက္က command line ကို run ေပးပါ။

$ sudo python zawgyi_keyboard.py

ဒီ command line မွာ sudo ဆိုတာ sudoer (super user) အသုံးျပဳအေနနဲ႔ run မယ္လို႔ ေျပာတာပါ။ ေနာက္ကဆက္လိုက္လာတဲ့ python ဆိုတာ Python လို႔ နာမည္ရတဲ့ Interpreter ပါ။ ဘာလို႔ Python Interpreter ကို zawgyi_keyboard.py ရဲ့အေရွ႕မွာခံၿပီး run လဲဆိုေတာ့ .py extension ပါတဲ့ zawgyi_keyboard.py ဟာ Python Programming အသုံးျပဳၿပီးေရးသားထားတဲ့ ဖိုင္ျဖစ္သလို႔ Python ဆိုတဲ့ command ကိုသုံးမွ Python Interpreter က zawgyi_keyboard.py script ကို ကြန္ျပဴတာနားလည္ေအာင္ လုပ္ေဆာင္ေပးနိုင္ေအာင္လို႔ပါ။ ကဲက်ေနာ္တို႔ install လုပ္တဲ့ အလုပ္ဆက္လုပ္ရေအာင္။ ေအာက္ကပုံကို ၾကည့္ပါ။ ပုံထဲကအတိုင္း zawgyi_keyboard.py script က စတင္ run ေနပါၿပီး။ ကိုယ့္ Terminal ထဲမွာလဲ ၾကည့္ပါ။ ဘာစာသားေတြေဖာ္ျပေနၿပီး ဘာ information ေတြ ခင္ဗ်ားကို ေပးေနသလဲဆိုတာ ေလ့လာပါ။


အဲဒီထဲမွာ install, remove, help, exit .. စတာေတြကိုေတြ႕ရမွာပါ။ က်ေနာ္တို႔က install လုပ္ခ်င္တဲ့အတြက္ Install လုပ္ဖို႔ရရာ small letter i ကို ႏွိပ္ေပးရမွာျဖစ္ပါတယ္။ s ကို ႏွိပ္ပါက show font ဆိုတဲ့ function ကို ေခၚတဲ့အတြက္ လက္ရွိစက္ထဲကို install လုပ္လိုက္တဲ့ဖြန္႔နဲ႔ Web မွာေနာက္ဆုံးထြက္ရွိေနတဲ့ font ကိုယွဥ္ျပ ေပးမွာပါ။ ဒါေပမယ့္ ကိုယ့္စက္မွာ အင္တာနက္ခ်ိတ္ဆက္ထားမွ အဲဒီ function ကအလုပ္လုပ္မွာပါ။ က်ေနာွတို႔ Install လုပ္ရေအာင္ i ကို keyboard ကေနရိုက္ၿပီး Enter ေခါက္လိုက္ပါ။ အဲဒါဆိုရင္ Python script က ေဇာွဂ်ီဖြန္႔နဲ႔ ေဇာွဂ်ီကီးဘုတ္ကို သက္ဆိုင္ရာေနရာဆီကို copy လုပ္ေပးျခင္းအားျဖင့္ Install လုပ္ေပးမွာပါ။


ခုဆိုရင္ ခင္ဗ်ားစက္ထဲမွာ ေဇာ္ဂ်ီဖြန္႔နဲ႔ ေဇာ္ဂ်ီကီးဘုတ္ေရာက္ေနပါၿပီး။ ေဇာ္ဂ်ီနဲ႔ေရးထားတဲ့ အင္တာနက္စာမ်က္ႏွာတို႔ ၾကည့္နိုင္ပါၿပီး။ က်န္တဲ့ options ေတြကိုလဲ လိုအပ္ရင္လိုအပ္သလို ခ်က္ခ်င္းကို run နိုင္ပါတယ္။ ဒါမွဟုတ္ ဒီ running script ကို exit လုပ္ၿပီးမွ ျပန္ run လိုကလဲ ျပန္ run ၿပီး install, remove, upgrade စတာေတြကို ဆက္လုပ္ေပးလို႔ရပါတယ္။ ေအာက္ကပုံေလ့လာျခင္းအားျဖင့္လဲ သိနိုင္ပါတယ္။


က်ေနာွတို႔ ဖြန္႔နဲ႔ကီးဘုတ္ကိုသြင္းေပးၿပီးတဲ့ေနာက္မွာ စာရိုက္ဖို႔အတြက္ US ကီးဘုတ္ကေန MMR ကီးဘုတ္ေျပာင္းဖို႔အတြက္ Keyboard Indicator ကို အသုံးျပဳဖို႔လိုအပ္ပါမယ္။ အဲဒီ Keyboard Indicator ကို ျမင္သာေအာင္ Panel ေပါွမွာ အရင္တင္ရေအာင္ Panel ေပါွမွာ mouse pointer ေထာက္ၿပီးေတာ့ Right Click ႏွိပ္လိုက္ပါ။


အေပါွကပုံမွာေပါွလာတဲ့ ႆPop-Up Menu ထဲက Add to Panel… ဆိုတာကို Left Click ႏွိပ္ေပးလိုက္ပါက ေအာက္က ပုံအတိုင္း ထပ္ေပါွလာမယ္။


အဲဒီအထဲက scroll bar ကိုဆြဲခ်ၿပီး ေအာက္ကပုံမွာျမင္ရတဲ့ Keyboard Indicator ဆိုတဲ့ဟာကို ေတြ႕ေအာင္ရပါမယ္။


ပုံထဲကလို Keyboard Indicator ကို select လုပ္ၿပီးရင္ေတာ့ ေအာက္နားေလးမွာရွိေနတဲ့ Add ဆိုတဲ့ button ကိုႏွိပ္ေပးလိုက္ပါ။ အဲဒီခါမွာ ကိုယ့္ရဲ့ Panel ထဲမွာ USA ဆိုၿပီး လက္ရွိကီးဘုတ္တေကႆငတကိုေဖာွျပ ေပးေနပါၿပီ။


ဒီအဆင့္ေရာက္ရင္ က်ေနာွတို႔ Myanmar Keyboard option ကိုလဲ Keyboard Indicator Program မွာထည့္မွာမို႔ Panel ေပါွမွာ ေပါွေနတဲ့ USA ဆိုတဲ့ စာလုံးေပါွမွာ Right Click ႏွိပ္ေပးလိုက္ပါ။ ေအာက္က ပုံအတိုင္းျမင္လာပါမယ္။


ပုံထဲမွာျမင္တဲ့ Pop-Up Menu ကေနပဲ Keyboard Preferences ကိုဆက္ၿပီး Left Click ႏွိပ္ေပးလိုက္ပါက ေအာက္ပုံအတိုင္း Keyboard Preferences Windows ငယ္ေလးေပါွလာပါမယ္။


အေပါွမွာျမင္ရတဲ့ ပုံထဲက Layouts Tab ကို သြားလိုက္ရင္ ေအာက္ကပုံအတိုင္း Layouts Tab Window ဆီကိုေရာက္သြားမယ္။


ပုံထဲမွာ Keyboard Layout အသစ္ကိုထည့္ဖို႔အတြက္ Add.. ဆိုတဲ့ button ကိုေတြ႕လိမ့္မယ္။


Add.. button ကိုႏွိပ္လိုက္ပါက ေအာက္ကပုံအတိုင္း Choose a Layout ဆိုတဲ့ Window အသစ္တခုထပ္ေပါွလာပါမယ္။


ပုံထဲမွာ Afghanistan ဆိုတဲ့ button မွာ down arrow ျမႇားေလးပါ။ က်ေနာွတို႔က Myanmar Keyboard Layout ကိုသုံးခ်င္တာဆိုေတာ့ Myanmar ဆိုတာကို down arrow ကိုႏွိပ္ၿပီး scroll down လုပ္ရင္း ရွာပါမယ္။ Myanmar ကိုေတြ႕ရင္ Left Click ႏွိပ္ၿပီး ေရြးခ်ယ္ေပးလိုက္ပါ။ ေအာက္ကပုံအတိုင္းျမင္ရပါမယ္။


အေပါွကပုံမွာျမင္ရတဲ့အတိုင္း Add button ေလးကိုႏွိပ္ေပးလိုက္တဲ့အခါ Keyboard Preferences Layouts Tab မွာ USA ၿပီးေတာ့ Myanmar ဆိုတာေပါွလာမွာပါ။


ဒါဆိုရင္ က်ေနာွတို႔စက္မွာ USA ေရာ Myanmar ကီးဘုတ္ေရာ အသုံးျပဳလို႔ရေနပါၿပီ။ ေနာက္တစ္ခုထပ္လုပ္ေပးဖို႔လိုေသးတာက အဲဒီ ကီးဘုတ္ႏွစ္ခုအတြက္ ဘာ keys အသုံးျပဳၿပီး ကီးဘုတ္ေျပာင္းမလဲ ဒါမွမဟုတ္ keyboard layout ကို ႏွစ္ခုအၾကား switch လုပ္ဖို႔ ဘာ shortcut keys အသုံးျပဳမလဲဆိုတဲ့ Layout Options setting ေလးထားေပးဖိုပါ။ အဲလိုထားေပးလိုက္ျခင္းအားျဖင့္ shortcut keys ေလးကိုႏွိပ္ေပး႐ုံနဲ႔ ဘီးဘုတ္ေျပာင္းလဲသြားေစပါတယ္။ ဒါေၾကာင့္ အေပါွကပုံမွာျမင္ရတဲ့ Layout Options button ေလးကိုဆက္ႏွိပ္ေပးၿပီး Keyboard Layout Options ဆီကိုသြားရေအာင္။ ေအာက္ကအတိုင္း Keyboard Layout Options Window ငယ္ထပ္ေပါွလာပါမယ္။ အဲဒီအထဲမွာ ကိုယ္ႏွစ္သက္ရာ option ကိုေရြးခ်ယ္နိုင္ပါတယ္။


Key(s) to change layout ထဲမွာ ကိုယ္ႀကိဳက္တဲ့ keys အတြဲကိုေရြးခ်ယ္ေပးၿပီးရင္ေတာ့ ဖြင့္ထားတဲ့ Keyboard Layout Windows ေတြကို ပိတ္နိုင္ပါၿပီ။ အရင္က ေဇာွဂ်ီဖြန္႔နဲ႔ေရးထားတဲ့ အင္တာနက္စာမ်က္ႏွာေတြ ဖိုင္ေတြကို ေဇာွဂ်ီဖြန္႔နဲ႔ အမွန္အတိုင္းျမင္ရတဲ့အဆင့္ကေန ခု ေဇာ္ဂ်ီကီးဘုတ္နဲ႔လဲ စာရိုက္နိုင္ပါၿပီး။ ေအာက္က ပုံကိုၾကည့္ပါ။ ေဇာ္ဂ်ီကီးဘုတ္က မွန္မွန္ကန္ကန္ေပၚျခင္းရွိ မရွိ gedit ဆိုတဲ့ Text editor နဲ႔ စမ္းရိုက္ၾကည့္တာပါ။


ဒါဆိုရင္ က်ေနာွတို႔ရဲ့ Ubuntu Linux မွာ ေဇာွဂ်ီဖြန္႔ကိုျမင္ရၿပီး ေဇာွဂ်ီကီးဘုတ္နဲ႔ရိုက္နိုင္ပါၿပီ။

အေပါွက နမူနာနည္းနာအတိုင္း myanmar3 unicode ဖြန္႔ကိုလဲ သြင္းနိုင္ပါတယ္။ myanmar3 unicode font နဲ႔ package ကိုေတာ့ mm3-keyboard package လို႔ေခါွၿပီး ခု lastest version က mm3-keyboard-0.1.1.tar.gz ပါ။ အဲဒီ package ကို zawgyi-keyboard.googlecode.com မွာ ရယူ download နိုင္ပါတယ္။ အဲဒီ zawgyi-keyboard project မွာရွိတဲ့ keyboard packages ေတြကေတာ့ free of charge ပါပဲ။ အလကားေပးပါတယ္။ ကိုေစတန္နဲ႔က်ေနာွတို႔က ကိုယ့္အတြက္ကိုယ္လုပ္ရင္း သူမ်ားကိုလဲ ေဝငွေပးတဲ့သေဘာပါပဲ။ အားလုံးလြတ္လြတ္လပ္လပ္ယူသုံးနိုင္ပါတယ္။

download PDF

Ref:မူရင္းလင့္

Search